|
|
Chapter 2: OCR'ing a Document
1. From the Start menu, click Programs, and open Caere OmniPage Pro 10.0. You may also double click the shortcut icon on your desktop if you have one. 2. Once the OmniPage screen displays, look at the far left corner at the top of the screen to be sure that the default setting has the program ready for Manual OCR (see Figure 1).
Figure 1: Manual OCR button highlighted 3. Click the Load File button to bring up the scanned image you need to OCR (see Figure 2).
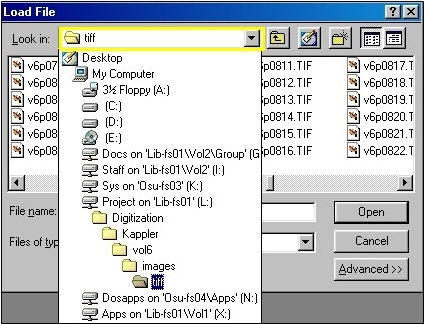
Figure 2: Load File button 4. From the Load File dialog box, select the L (l:) drive, the Digitization folder, the proper project folder, the proper volume folder, the images folder, then the tiff folder. 5. In the tiff folder, double click the page number of the article you need to OCR. For example, if you need to OCR an article in Kappler that is one page 821 in volume VI from the Look in box inside the Load File dialog box (see Figure 3) select the following folders and files: (l:)>Kappler>vol6>images>tiff>v6p0821
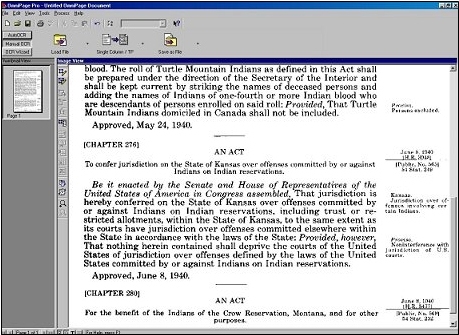
Figure 3: Look in box in Load File dialog box If you need to load more than one page at a time, see the Helpful Hints box for this chapter. 6. On the left side of the OmniPage screen is a view of the loaded files. To the right of this frame is the frame that holds a larger view of the page you select from the frame on the left of the screen (see Figure 4).
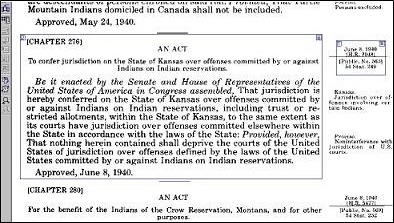
Figure 4: OmniPage screen with Thumbnail View frame and Image View frame visible. 7. Now it is time to "zone" the document. Visualize a box around the text or image you need and place (don't click anything, yet!) your mouse cursor in the upper left corner of that box. Now press the left button on your mouse and hold the button down as you draw a box around the text you need to OCR. You can draw more than one box if necessary. You may need to draw more than one box if you want text in two different areas in the scanned document in the same document, but you don't want to include all of the text on that page. For example, when scanning a document with margin notes, you might want the text directly above the margin notes and the text to the side of the margin notes, but you don't want the margin notes yet (for more information about OCR'ing text with margin notes, read the next section). In this case you would draw a box around the text directly above the margin notes, and a box around the text to the side of the margin notes (see Figure 5).
Figure 5: Two different zoning boxes around different text 8. Once you have zoned all the necessary text, it is time to save it. To do this, click the Save as File button (see Figure 6) at the top of the OmniPage screen, in the same area as the Load File button.
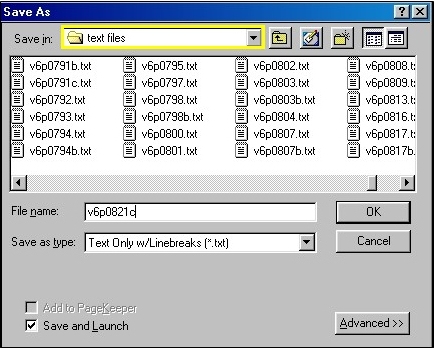
Figure 6: Save as File button 9. After you press the Save as File button, the Save As dialog box displays. Using the Save in box at the top of the Save As dialog box, go to the L drive, the proper project folder, the proper volume folder, then the text folder (see Figure7).
Figure 7: Save As dialog box with Save in box highlighted. If you've been scanning, you've gotten used to going into the images folder, but that is only for opening and saving images. Now you are going to OCR, so be sure you save this document in the text folder. For example, if you had zoned part of page 821 of Volume VI in Kappler, you should follow this pattern in the Save in box: (l:)>Digitization>Kappler>vol6>text files 10. After you reach the text files area, you must now name your document. Name it according to its volume number and page number (a four-digit number). Using the example from the paragraph above, the file name would like this: v6p0821. Note: Also name the files according to their order on the page. More than one article may fit on one page for some collections, but only name the ones that start on that page. For example, if page 821 had three articles that started on that page, you would name the first one v6p0821, the second one v6p0821b, and the third one v6p0821c. You do not need to include "a" after the first file's name because we just assume that if there is no letter after the file name, it is the first one on that page. If you have text that continues onto the next page, this is part of the article from the previous page, so do not designate the next article on the next page as "b." In Figure 8 below you can see how the text at the top of the page is continued from the previous page. Because it is continued, it does not count as the first article of this page, so do not designate the next article "b." The next article is actually the first one of the new page, so it will have the invisible designation of "a."
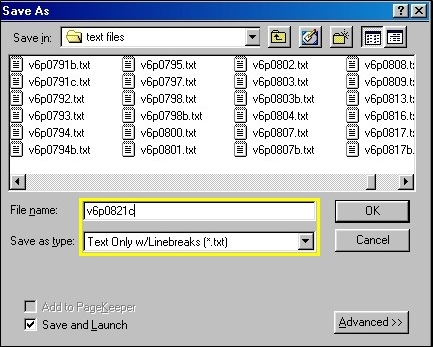
Figure 8: Text continued onto next page does not qualify as the first article on the new page. 11. Now you must designate what type to save your file as. Save your document as Text Only with Linebreaks (see Figure 9).
Figure 9: Save As dialog box with Save as type box highlighted 12. Now you can actually save your document, so after typing in the correct file name and designating it as a Text Only with Linebreaks document, click OK. 13. After you click OK, two more boxes display before you actually get to your saved document. The first one is the OmniPage Pro dialog box (see Figure 10). Always click yes for this box, or, because yes is its default setting, you can just press Enter.
Figure 10: OmniPage Pro dialog box with yes button selected The second box is the Zoning Instructions dialog box (see Figure 11). Always click the Use Only Current Zones button, or, because this button is the program's default setting, you can just press Enter.
Figure 11: Zoning Instructions dialog box with Use only current zones button selected 14. Your saved document will automatically open in Notepad, but you may want to close this program and open it another word processing program such as Microsoft Word is you have more experience with that program.
How do I OCR text with margin notes? Some projects such as Kappler have documents with margin notes. Depending on the length of the article, it may contain from one to more than 300 margin notes. We have found that it is sometimes easier to OCR and save the margin notes in a separate document from the rest of the text, copy and paste the margin notes into the text document, then OCR the entire document. The following steps will tell you how to OCR text with margin notes, but you should already be familiar with OCR'ing in general, so if you have not already read the beginning of this chapter, do so now so you will know the basic procedures and terms in these steps. 1. In OmniPage, load all the pages of the article with margin notes. 2. Zone only the margin notes on each page. 3. Click the Save as File button (see Figure12).
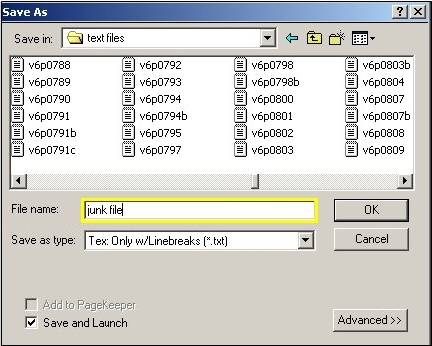
Figure 12: Save as File button 4. DO NOT name this file according to its volume number and the page number the margin notes start on. You will save all the margin notes for each new article in the same file, so name this file anything you want, such as junk file.txt, your name.txt, or margin notes.txt. 5. Type in your file name in the File name area of the Save As dialog box (see Figure 13).
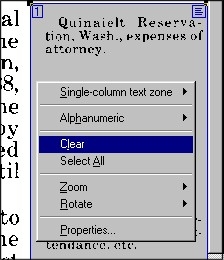
Figure 13: Save As dialog box 6. Save the file as a Text only w/Linebreaks file type in the Save as type area of the Save as dialog box (see Figure 13 above). 7. Right click inside each zone, and select Clear from the right-click menu (see Figure 14).
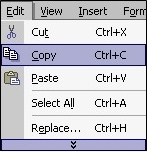
Figure 14: Right-click menu inside each zone 8. Clear the zones around the margin notes on each page. 9. Zone the rest of the text on each page of the article. 10. Save in the text files folder of the proper project folder and proper volume folder according to the text's volume number and page number (and the order in which it appears on that page--b, c, d, and so forth). 11. Open the margin notes file in Word, or some other word processor. 12. Highlight and copy all of the margin notes. The Copy function can be found either in the Edit menu (see Figure 15) in the toolbar, or by clicking the Copy icon (see Figure 16).
13. Open the text document that the margin notes belong in. 14. Paste the margin notes into the text document at the beginning. The Paste function can also be found either in the Edit menu, or by clicking the Paste icon, next to the Copy icon (see Figure 17).
Figure 17: Paste icon 15. Indicate within the body text of the article where the margin notes belong. 16. Proof and organize the entire document. Note: The way you organize the margin notes within the text may vary from project to project.
|